


Week one of the Diamonds Weave Along is wrapping up and, as expected, there are people who are warped and weaving and people still deciding on pattern and materials. This is entirely normal and so much fun to see!
On the rigid heddle front, we’ve had a few things come up and I thought that it might be good to review the issues and concerns that folks have had.
The big “mea culpa” is my own
First, let me address something that came up regarding the “Pattern with Video” option on the Weave Along RHL pattern (and, honestly, *all* of my patterns with videos). The QR code for the video access “expired.” I didn’t know that could happen but, as with all “free options” online, the fine print changed and the code had too many clicks.1
How annoying for you all - and me! I spent an afternoon updating ALL the QR codes in my products (finding a different QR code provider in the process). I’m pretty certain that I’ve caught them all, though the ones for class add-ons may not work.
Note: the HTML links that are either hot-linked or cut-and-paste are still valid. Just the QR codes for these things failed. You still have access to the video - just not by using the totally convenient QR code.
If you would like an updated version of the pattern with a working QR code, please use the email (found at the end of the pattern) and I’ll send you an updated PDF.
News from the Facebook Group
Several folks started warping and threading their RHLs this week - hooray! A couple of things have come up and, in the spirit of “learning from the struggles of others,” I thought I’d share a few.
First, there was a weaver who threaded her loom left-to-right. The pattern is written to be threaded right-to-left (and I’ll talk about why in a minute). The easy answer to this is, when threading, swap the words “left” and “right” and all should be well. It won’t be easy, and you might temporarily become left/right challenged, but that should pass.
Threading direction is a funny thing. Automatically, one might assume that threading left-to-right (corresponding to the direction I read) would be natural. However, there are more than a few factors that contribute to how people naturally choose to thread. For me, one of them is the physical space in which I work. When I set-up a warp of 2.5 yards or less, that space is bounded on the right in such a way that it’s difficult to walk around the right side of my loom, but the left is totally clear. Thus, warping right-to-left makes sense as I don’t want to get “trapped” by my direct warping process.
Another reason I write patterns threading right-to-left has to do with the designing program I use. Handweaving.net has a draft editor and the “tie-up”2 is in the upper right hand corner. Our Diamonds Weave Along pattern progresses from an easier pattern of 4 ends to a final design using 22 ends. The easier pattern ended up in the upper right corner of the design because it’s where I started designing. Other programs (and some book drafts) are arranged with the tie-up box in the upper left corner. If I had gone with one of those programs, I would likely write my threading instructions from left-to-right.
Here’s the kicker - once you learn how to read the drafts and draw-downs, it doesn’t matter which direction you thread. I have to write the step-by-step instructions in one direction OR the other. It made sense for this pattern to start with the easiest threading and progress to the more complex, which meant working right-to-left. But if you can read the drafts and charts, you can start wherever works best for you.
A second concern that came up was the visibility of seeing the paths of the threads when threading the front heddle. This one is tricky, because it depends on a lot of variables - your loom brand, your threading hook choice, whether you need cheaters to do the job (and whether you could find them…)! But a few good options were offered.
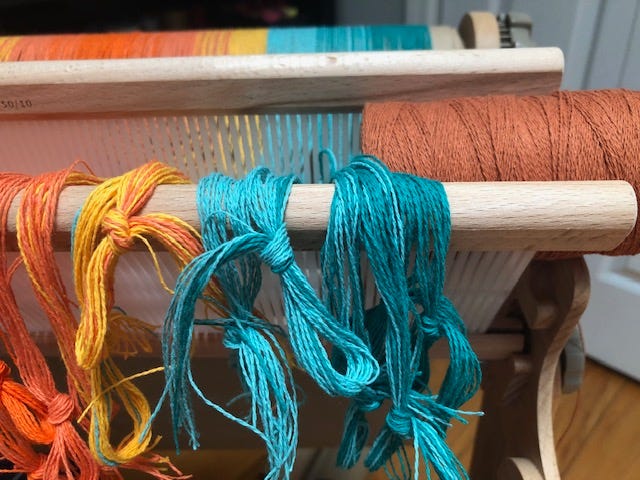
My usual technique is to place a partial mini-cone of yarn between the two heddles when threading the front heddle. On Ashford looms, the heddles tend to tilt forward at the top, which means that the back heddle isn’t always clearly visible. Putting the cone between them (see the above photo) pushes them apart enough that I can see where in the back my next threads are and still see my front heddle clearly.
A second technique that someone mentioned (and I’ve used this one, too), is to place the front heddle in the “heddle down” position, exposing the back heddle and making the front clear to view as well. Should you try this, PLEASE rig some rubber bands around your front heddle to secure it in the down position. There’s no right/wrong way to make that secure - but you don’t want that front heddle to fall out of the lowered position while you’re threading. I found this technique worked well, but I did struggle a bit with my Ashford threading hook - the slant between the heddles didn’t quite match the natural position of how I use my hook.
If you’ve got additional tips or tricks that you use - maybe something you think is unique to your brand of loom - please post them in the comments below (or in the FB group if you’re participating there!) My weaving experience is entirely on Ashford3 SampleIts and traditional looms and I’m sure that other looms have other advantages/challenges when threading two heddles.
A quick reminder
If you want to have your project - finished or in progress - included in the “end of WAL” gallery video, please email me a photo and I will forward it to Chris Acton to include in the video.
What’s in the works
Well, my intentions have been very good, but it’s been a chaotic few weeks. My mom’s health has declined to a point that hospice has been seeing her daily. We are as prepared for her final end as we can be, but it takes a bit of energy (emotional and otherwise) to live in this state of waiting.
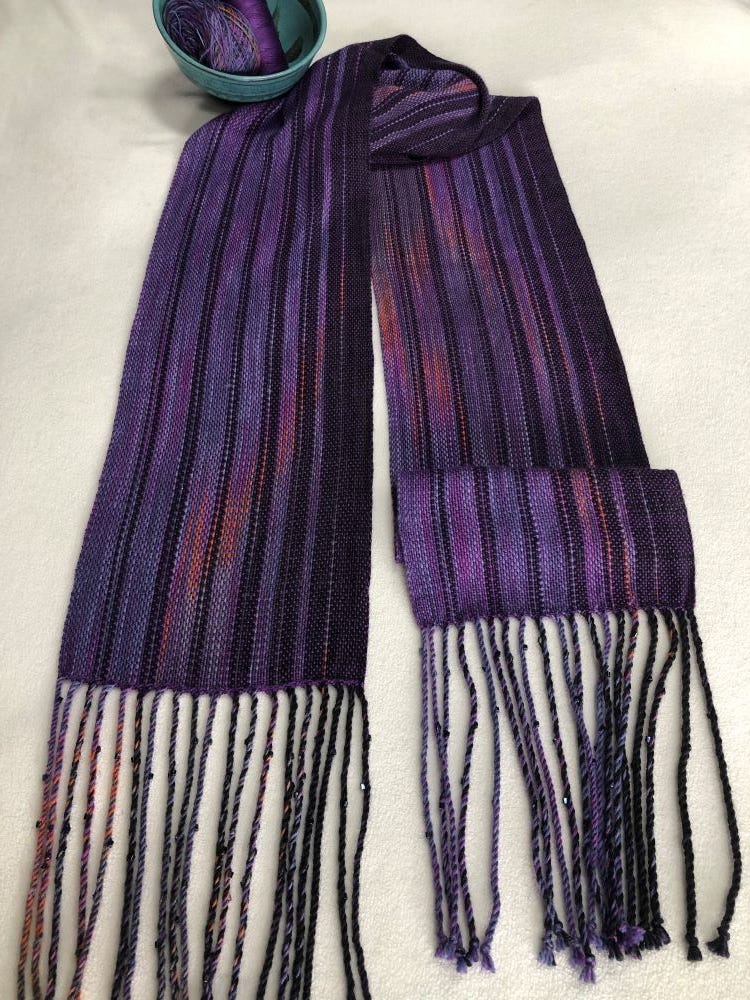
However, the scarf above garnered a fair amount of interest on Facebook (amusingly, since I wove a previous iteration of it earlier this past summer, so it’s not entirely *new.*) I’m working now on a “recipe” of a pattern - how to identify and work with palindrome skeins to create warp-dominant weaves. It will have a progressive warp pattern, using a palindrome skein and a coordinating semi/solid color, and I’m making a couple of new samples using that warp pattern.4 Unlike my previous palindrome pattern, Tiger Lilies by the Roadside, which is based on a specific colorway dyed by a local-to-me dyer and featuring the clasped weft technique, this new pattern will be a bit more generic regarding yarns. It will have several examples of palindrome skeins, ideas of how to use them in a warp, and specific weft ideas.5
I’m also working on a sew-your-weaving project! I’m really excited about this because the final project is eminently usable AND it can be made on a 10” (or even narrower) loom! I’m in the sewing stages, making notes as I go in order to write the sewing part of the pattern. Hopefully I’ll be writing and completing this next week.
Don’t forget to log-in to Substack and comment with your progress on the weave along, ideas for making the threading more visible on your loom, and anything else you want to share! I love hearing from you!
By the way, hassle that it might have been to correct, too many “clicks” was kind of a cool thing. Thank you for that!
The tie-up is where you specify which row of your chart represents which shaft and which of those shafts will be lifted when you move the heddles (or “tied up” when you use a rising shed floor loom).
Ashford, because that’s what my local yarn shop carries and I’ve loved my Ashford spinning wheel.
The warp pattern in this project above, and the original scarf, were unnecessarily complex. Simplification was definitely needed as the scarf shown has an more than one warp “error,” so reproducing it wasn’t an option anyway.
There is some “slight” overlap between this new pattern idea and both “Tiger Lilies by the Roadside” and “My Favorite Scarf” patterns. It can’t be helped in order to be thorough, but in case you were wondering.