
Loom Waste
What it is and why it matters....

I’m probably opening a can of worms with this topic and I’ve had it on my list to cover for a while. But a few recent questions in FB groups, plus a comment from one of my readers, gave me the push to talk about loom waste and other, related, topics. This is a longer newsletter, so grab something to drink and let’s get to it!
So, what IS loom waste?
In short, loom waste is the yarn that you simply cannot weave when working a project on your loom. It varies - a LOT - depending on the type of loom and the techniques you use when warping, and even weaving, your project.
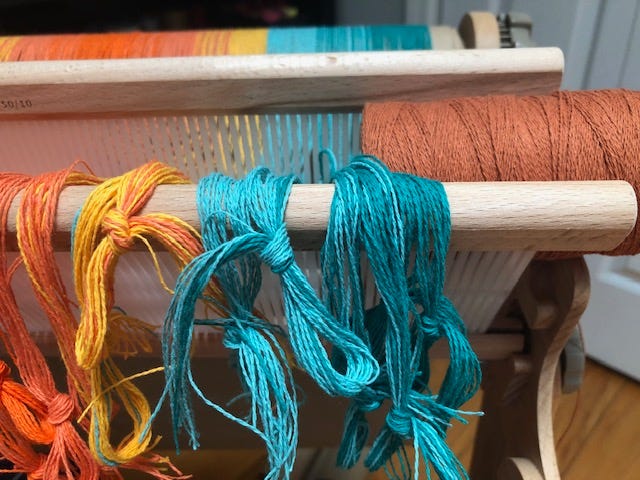
Let’s briefly walk through the basic steps of direct warping your rigid heddle for plain weave.1 (A) We use our looms and a peg at XX” (some number of inches) of distance away from our back apron rod to both measure and partially thread our looms. We tie onto the back rod, then pull a loop of the yarn through the heddle and take it to the peg. We loop this yarn over the peg, returning to the back of the loom to get a second loop, and repeat for as many ends as the plan requires.
Then, we wind our warp onto the back beam, using the packing materials of our choice. At some point we cut the ends of our loops (this point varies) and we thread the holes in our heddles. (B) Then we tie onto the front apron rod, adjusting those knots to achieve weaving tension. (C) We then use waste material to spread our warp, closing up any spaces between our knotted bouts, and we are ready to weave. (D) We weave our project in plain weave, then cut the project from the loom and wet-finish it per the project/fiber instructions. (E) What we have left over that isn’t woven is loom waste.
Stepping through the various letters, we can identify points in the process that might affect loom waste. In case you’re not a regular footnote reader, I’ve tried to note what I do in the footnotes as a point of reference.2 Please let me stress - the question is not “how much loom waste *should* I have?” but rather, “how much loom waste *do* I have?” There’s no right or wrong answer to the first question; knowing the answer to the second question is eminently beneficial.
A. The first factor is the loom itself. “Rigid heddle loom” covers a wide variety of manufacturers and styles. I have two Ashford SampleIts and one standard-sized RHL. The SampleIts are designed with a shorter distance between the front and back beams. Ashford makes a folding Knitters Loom - they warp a bit differently (I’ve heard) and they may necessitate a bit more (or less) loom waste. And those three styles are just representative of one manufacturer! So your loom itself comes with certain aspects of design that is going to affect how much loom waste any project requires.
With our loom and peg set-up, there are a couple of things to consider here. First, if you’re measuring your warp distance, what specific points are you using to, say, create that 95” scarf warp? Do you measure from the back beam to the middle of the peg? To the front of the peg?3 Do you extend the apron rod and measure from that instead of the back beam? Is the peg you are using on a surface that is entirely stable, or could it slowly shift toward the loom during warping?4 All of these subtle differences are going to be multiplied over the width of the warp. A 1” difference in measuring points on a warp of 244 ends of doubled 8/2 could be a 14 *yard* difference between what the pattern calls for in yardage and what you might need.
As with many things in weaving, consistency is the ticket here. Decide what points YOU are going to use to measure your warp and use them consistently. That will help you figure out what type of loom waste your process - and loom - needs.
B. Tying on is major creator of loom waste, and yet it’s unavoidable. Even if you use the most economical means of tying onto your front beam, you will have yarn at this point that you simply cannot weave. How much yarn and what kind of knot and/or bow you use can be a significant figure. Most loom waste figures assume about 7” for knots, but it’s useful to know what you *actually* use and whether it’s more or less.5 Again, if your knots are doing everything you need them to do, don’t feel pressured to change them. But do figure out whether your technique might use considerably more yarn than 6-8”.
One tool I like having in my toolbox is lashing on. I turn to it when I’m working with slippery fibers like bamboo or Tencel OR when I don’t know if I’ve got enough warp for an idea and just want the extra insurance of a few more warp inches. Here’s a video that does a great job walking you through the process on a rigid heddle loom.
C. Bout sizes when tying on is a significant factor in the loom waste equation. If you tie your warp in largish bundles (aka. bouts, more than about 1” in width), it’s going to take more waste material to bring that warp together for weaving.6 And what you use to bring your warp together can affect your loom waste. If you use bulky waste material,7 it’s likely going to take more warp inches before you get to the point you can start weaving your fabric. This is an area that is worth exploring - how you can reduce how much warp you need to “waste” before weaving. And if you’re totally happy with what you do - don’t change it. Just be aware that you might be eating into what the designer considered workable warp inches.
D. Weaving in plain weave seems so simple. But it can also be, if not a source of loom waste, a point where we use more warp than the designer might have accounted for. Where possible in my patterns, I try to include a PPI number - Picks Per Inch - and note what that figure is while the piece is still under tension.
If you don’t know how tightly to beat the yarns in your project, then it shouldn’t be surprising if you have a towel that is 6” shorter than the first one because you ran out of warp.8 Usually, the number in a pattern is for after wet-finishing and will be slightly (but not dramatically) higher than it is when weaving. Think 8-9 when under tension on the loom, 10-11 when off the loom, 10-12 after wet-finishing. But not beating enough, or beating too much, can affect how many coasters you get from a warp, or the length of towel #2, as much as any warp measurement concern. Comparing your finished item length to the finished size specified in the pattern may give you a clue about whether you need to check your PPI while weaving.
E. Warp that is remaining that isn’t woven - AND isn’t intended for fringe when applicable - is loom waste. I'm often caught out a bit short on the fringe, especially the end closest to the front beam. Because I’ve taken steps to reduce my loom waste at the front of my loom, I sometimes have only 6” of fringe when the original plan was 7”. Some folks don’t want to use the knot material for fringe (it becomes kinked or, for some, it’s a knot they struggle to untie). If that’s you, then realize that you might need to account for a bit more warp in the original total figure to have acceptable ends for fringe.
Finally, some folks feel that they haven’t used their entire warp unless they simply can’t get the apron rod any closer to the fell line. I usually choose to stop weaving when my apron rod is “just” trying to come off the back beam. Having it suspended between the heddle and the beam can create tension issues, and if you’ve warped stripes, it will be where crossed threads could give you grief. If you have to go here, here’s a neat trick for adding some picks behind the heddle to keep things organized.
I’ve said a LOT of things here, but I haven’t really told you how to measure your loom waste. My friend, Chris Acton, did a short little video on how she went about measuring her loom waste and she makes some excellent points!9
Now for the big reveal - what is *my* loom waste?
I have no idea. Seriously. I don’t have a single “number” in my head - but I start with the industry standard of 18” for rigid heddle looms when I put things together and it’s usually spot on. I know that for scarves, I like a 95” warp (I like them long, I want room for fringe, and I often use wool, which has some natural stretch). Palindrome scarves (again, in wool) usually need about 105” for the warp, to account for matching up the color blocks. For two towels of about 35” (woven on the loom length, including hems), I need a minimum of about 95”-100”. This is where experience and record keeping come to my aid.
For everything else, I assume 18” and go from there. But just because I can work within the “industry standard” doesn’t mean that your loom and techniques fit that number - and that is totally fine.
When creating a pattern, I start with 18” for loom waste and then I gauge where I end up on the warp. If I’m anywhere close to having the apron rod come off the back beam, I add at least 5”, plus I usually add 5” for the front as well, because I know I get lower-than-average numbers there.
This is a tricky thing for designers. If loom waste numbers for rigid heddle weavers average 18”, then some folks are using less (it can’t be a LOT less, because there are inherent limits) and some folks require more (and that figure is the big unknown.) It becomes a balancing act at times. If I add too much extra for loom waste, then the person in the average or below range might think I’m padding the yarn requirements to help sell yarn!10 If I fall in the too little loom waste camp, then the folks needing a bit more might think I didn’t really know what I was doing. Add in the beating question of how many PPI the weaver is getting versus what the designer recommends, and you can see how this is a quagmire of math and compromise.
So, what do *you* do with this information?
Well, I love Chris’s method of finding your “number” for warp waste. It’s simple, it’s direct, and it’s real. But knowing this number is just the first step.
The most important thing you can do is look at what the pattern tells you about the warp. Most (not all) patterns will tell you that the warp should be (for instance) “95” in length, with 7” for take-up, and 18” loom waste.”11
If you know that your loom waste figure is 24”, then you need to add 6” to that warp length (for 101” in my example) to account for your loom waste. I’ve seen rigid heddle patterns with 32” of loom waste listed and, depending on how confident I feel about what I’m getting ready to do, I’ll reduce that some. I might not take it down to 18”, but I’ll reduce it to something closer to what I feel is *my* normal, or use the extra for a sample.
Knowing what you normally need is the key. Using consistent techniques, or understanding how using a different technique might affect your loom waste, can help you avoid the dreaded “too short warp.”
Patterns are a teaching tool, but every student is different and what they do at their loom may differ (wildly) from what the project designer might do. Neither individual need be “right” or “wrong”; our individual practices at our looms are part of our processes and those should be something we enjoy! But knowing that there are places where we may need to adapt the pattern to account for our own tools will lead to less frustration and, perhaps, less self-incrimination, which is always a good thing. You may not have made a mistake measuring your warp - which is what we usually decide when towel #2 is too short. Knowing where you can adjust, adapt, and overcome is a key to future success.
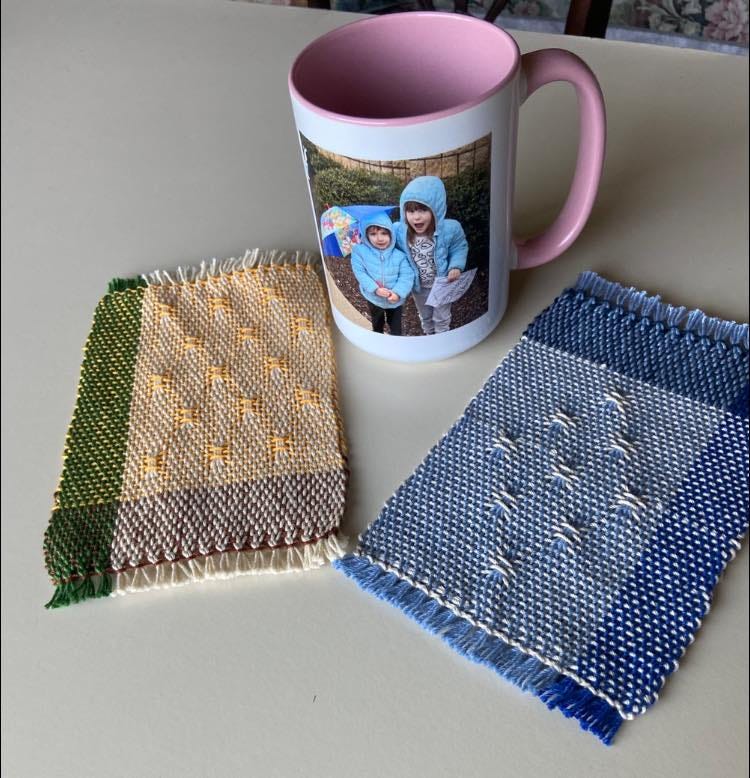
Fantastic Finishes
Yep, I think the name has changed.12 What better photo to share than one that came from an email that helped to prompt the topic for the newsletter! These are *both* the Sunflower and Snowflake Coasters, woven by D.H.13 and they are going to become gifts!
I usually publish twice a month - next month we have a US holiday around my usual publication time and family coming in for a visit. Jodi at Cotton Clouds and I are plotting a Supplemental Weft/Warp class for July - date to be determined. I’m working kit sample #1/concept sample #2, so it’s proceeding apace. Narrowing down what we can cover in a reasonable class time is tough - there are *so* many cool ideas!
This has been a big one - lots of thoughts, lots of room for discussion and debate! If you’ve got a warp measurement tip or loom waste story you’d like to share, please leave it in the comments! I hope, however, I’ve started some wheels turning for you, either in the direction of “know thyself and thy loom waste figure,” or “maybe I need to pay more attention to PPI in the patterns, “ or something else. Whatever direction my musings take you, I hope it’s been worth your while to read through this!
I’m using the (LETTERS) to identify places in the process where you can easily see how individual style or technique can affect your loom waste.
Which isn’t to say I do everything *right* - but it’s easier to answer the questions in advance than otherwise.
I extend my apron rod by hooking rubber bands to my heddle (having it in the back heddle position) and around the ends of the rod. I find it makes it easier to wrap around the rod if it’s suspended. It’s one reason I *like* the plastic apron rod connectors on the Ashford looms, because they are not floppy and make this easier to do. I also measure to the front of my peg, so I have a tiny bit of “extra” warp wrapping around the peg itself.
On one of my first warps, I used a piano bench full of music for attaching my warping peg. I had so much tension on the warp, I moved the piano bench by several inches! Chairs can also be a problem for this. It pays to find a good place, and a heavy foundation to attach that peg to, for regular warping.
I use my front beam as the measuring point for the ends of my warp as I wind on. I also use only half a knot - but it’s double wrapped (so kind of a surgeon’s knot, but not a full one). Think of tying your shoe, that first wrap you do; I wrap that twice, and then cinch it down. It’s easy to re-tighten, it doesn’t slip (with most yarns) and I don’t have to put a bow on it.
I aim for about 3/4” wide warp segments for my bouts, often about 8 ends, which certainly can take a bit more time to tie on. However, once I settled on this figure, I found that I have, in general, more even tension and spend less time fighting with the knots to get everything tight. It also takes a LOT less weaving with waste yarn to get the warp to come together.
I’ve heard of several things being used for waste “yarn”, including toilet paper! You do you, but after wet-finishing, I often pull out my (DK cotton) waste yarn and reuse it on the next project. So even that’s not wasted with a single use, though it may take the remainder of my lifetime to use up that pink worsted cotton…sigh….
My first 8/2 cotton towel is really more of a receiving blanket. It came out about 38” long after wet-finishing and I definitely didn’t have enough warp for a second one. It has *lovely* drape however, and a PPI of, maybe, 6-7 (normally, 8/2 towels have PPIs in the 10-12 range). I was afraid of the dreaded “overbeating,” so I under-beat. I’m sure the designer included a PPI number, but I was too new to figure out what it meant, or how it applied.
Chris IS a multi-shaft weaver, but her methodology works for the rigid heddle as well. And her take-away points are useful!
Admittedly, folks seldom complain about having too much warp for a project.
“Take up” is the phrase we use to explain where the warp inches go that aren’t in the loom waste or in the final project dimensions. It represents the path the warp needed to take in the over/under process of weaving and is probably tiny increments of inches per pick. Multiply those tiny increments by hundreds of picks, however, and the inches add up.
Because, in my head, I finish this with “and where to find them.” It’s a Harry Potter reference that makes me happy.
*Not* my Dear Husband (DH), but a weaver with the initials DH. LOL!
Hi Michele,
I enjoyed reading this article as it has so many valuable pieces of information on Yarn waste, and how to reduce it. I also found your article and the accompanying videos very helpful