April 1 is the kick-off for the the Acton Weave Along with the Undulating Twill table runner! If you haven’t joined, the Facebook group (just for the WAL) is open and there’s still time to get yourself organized. The first week of the WAL is, quite literally, gathering your materials.1 The second week will likely be “dress your loom,” which is another way of saying “warp speed ahead!” So, don’t fret if you are not quite ready. And if April isn’t a good month to participate, the pattern and pattern with video will be available to purchase indefinitely, though the FB group will close sometime in early May.
But, all of the talk about what you will need has had me fielding a fair number of questions about heddle rods and string heddles.
Why do we need the extra tools?
If you’ve not worked a multi-shaft pattern before, fair question. The number of “extra tools” you need depends on the starting pattern. Twills have an “advancing” sort of lift pattern, meaning (if working on a multi-shaft loom) that you lift the shafts of the loom in a specific pattern, usually 1&2, 2&3, 3&4, and 4&1. There’s no way to thread a rigid heddle loom that allows you to create those specific sheds using just one or two heddles, so we have to get creative.2
Usually, the first step is to insert a pick-up stick, which allows you to create a temporary shed on demand. Pick-up sticks are inserted with the heddle in the down position, exposing the slot threads for pick-up. Perhaps you’ve done a single-heddle project with a pick-up stick. Each time you put the pick-up stick into play (either with the rigid heddle in the up shed or just the pick-up stick pulled forward), you’ve created a new, temporary, shed.3 But, while you *can* use more than one pick-up stick, those specific situations don’t apply to adapting multi-shaft patterns to the RHL.4
The undulating twill (in the WAL patterns, or in general) is a four-shaft draft. Because we need to work with lifts only, the pick-up stick takes one of the shafts and the heddle rod (with string heddles) takes another one.5
Here’s what you need:
I’m a “make do” kind of person, so I don’t find heddle rods fussy or difficult to use. They get a lot of bad press online and it makes me wonder exactly what folks were trying to use and why it didn’t work. So here’s what I do, and I find it works well *for me.*6
The dowel - please, don’t go pull a skinny craft dowel from your stash that’s been there for the 10 years since your last child made crafts at home. It’s likely warped and probably too flimsy to be helpful here. My heddle rods are all in the 3/8” to 1/2” in diameter range and they do not bow when lifted with 40-70 threaded string heddles. It’s a lot easier to lift a heddle rod if it’s evenly distributing your lifting force, rather than bowing in the middle.
The dowel length - I’ve cut mine to the length of my heddles. In hindsight, I would have made them about 1-2” wider than the frame width of my loom, in case I need to park them when there’s no tension on the warp, rather than have them fall through to the floor. Plus, that extra inch gives you just a bit more space on the ends if you warp the full width of your loom. On my 24” loom, that would be a 27” heddle rod. But my 24” rod works well and hasn’t misbehaved to the point that I feel obligated to replace it.
The string heddles - this is where my instructions (and practice) depart from tradition. Essentially, the string heddles are a circle of a non-stretchy yarn that loops under the desired warp thread and hooks onto the heddle rod. Choosing the non-stretchy yarn is key. I’ve used a variety of things, but I’ve settled on cotton Seine Twine. It’s strong, non-fraying, doesn’t abrade the yarn I’m weaving with OR become abraded by the warp, and it has enough “tooth” to hold a knot.
The problem with Seine Twine is that it is tough to get small quantities and, if you’re not already using it for something, its expensive.7 Alternatively, an 8/4, 5/3, or other, slightly heavier, cotton weaving yarn will work as well.8 Avoid “fluffy” options, like kitchen or butcher’s twine, as it will either untie during a lift, start to fuzz all over, or even abrade through. Don’t use real twine - like the harsh, pokey, stuff you use in the garden - it could snag your warp. But DO use what you have access to in order to start - don’t wait for the “perfect” string for your heddles. They are imminently reusable, but you can also replace them as you source better materials.
String heddle length
Ah, and this is where it gets interesting. Most resources (online, classes, books) suggest you tie your string heddles around the outside (height) of an existing rigid heddle. I’ll admit, the heddle makes a nice jig, and it’s convenient as you already have it on hand. It makes a 10.5” loop, with a 5.25” diameter (doubled). Honestly, it works, and if the following instructions are too finicky for you, go for it!

Here were my problems with this set-up. First, when tying your string around your heddle, you’re forced into using a square knot. For some reason, I struggled with my knots working loose while I used my string heddles. Multiple times, I would find an error in my weave and it would trace back to a string heddle coming untied.
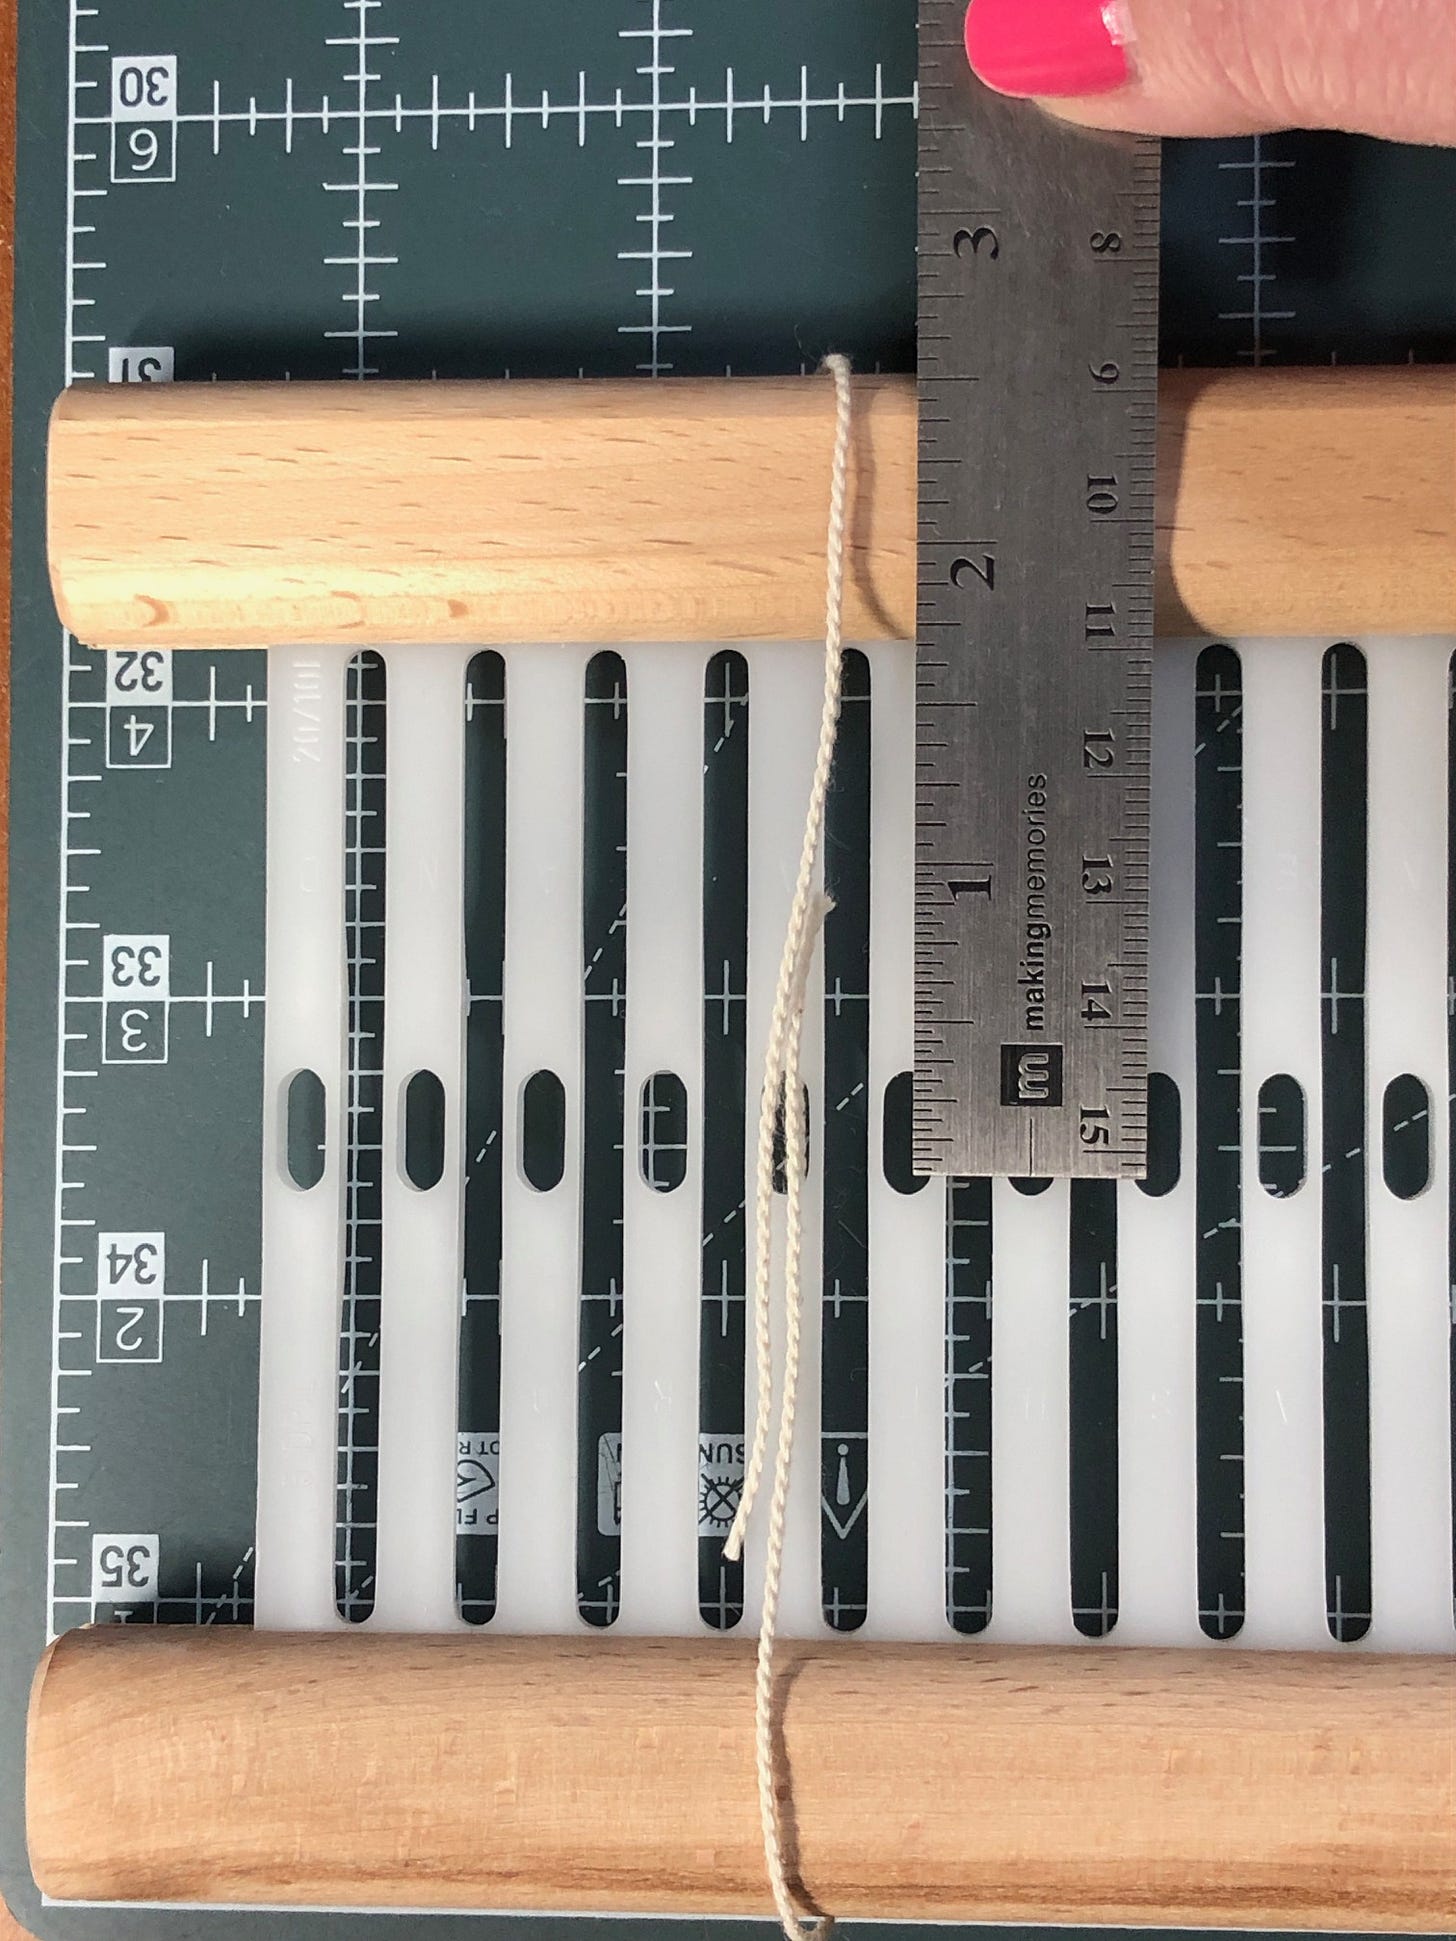
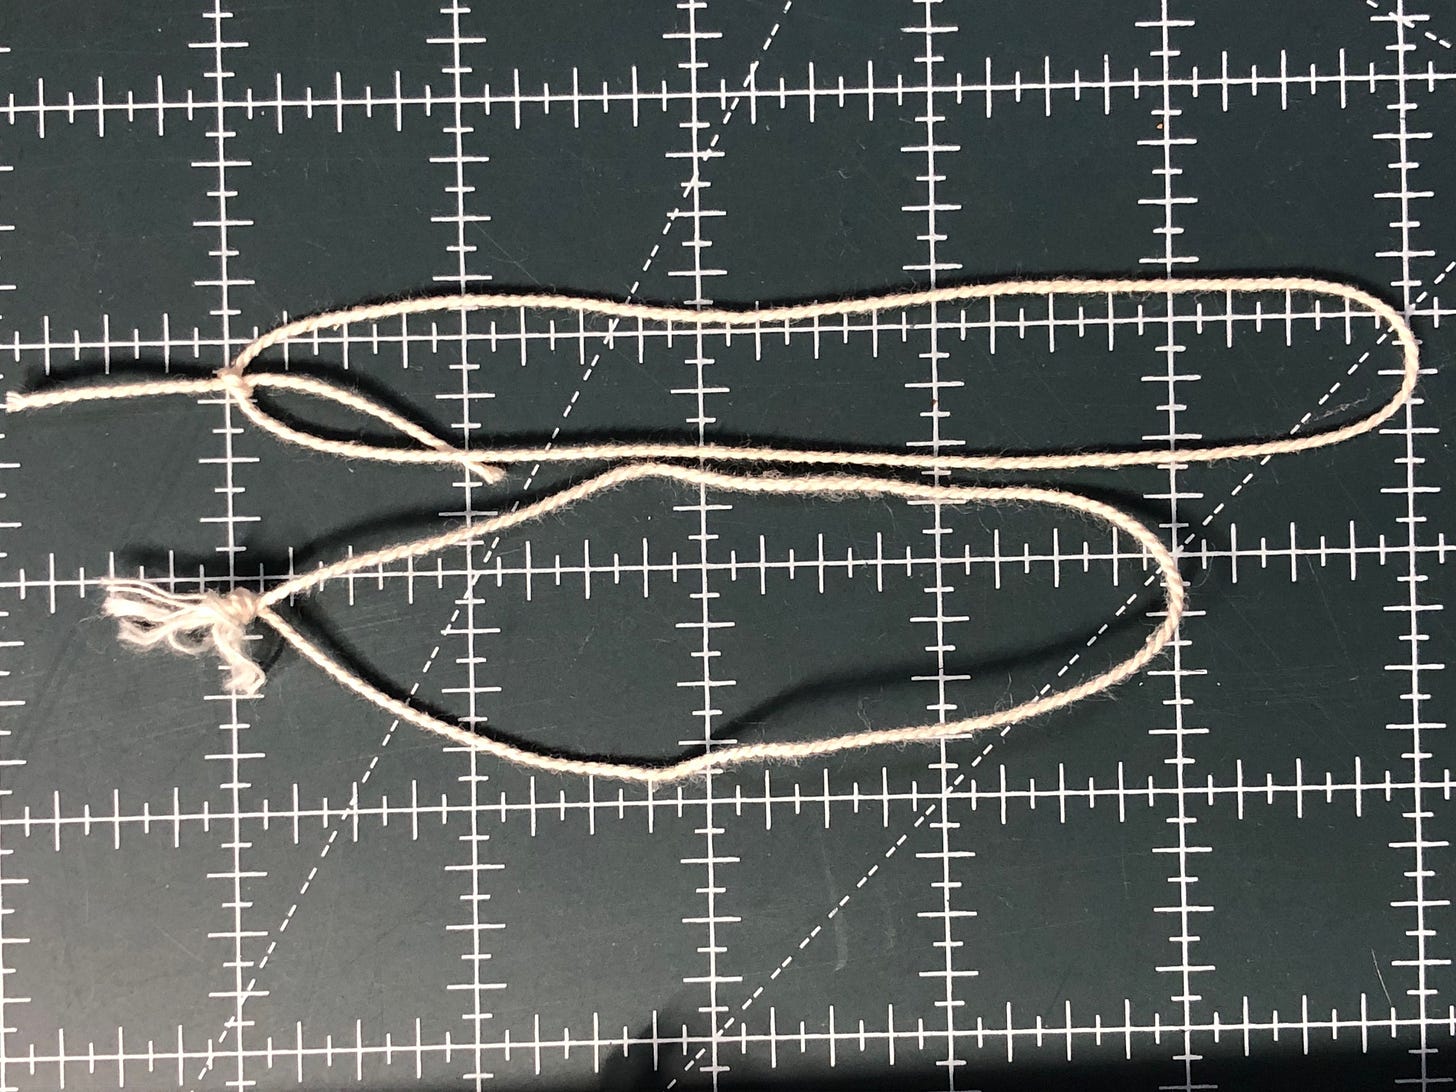
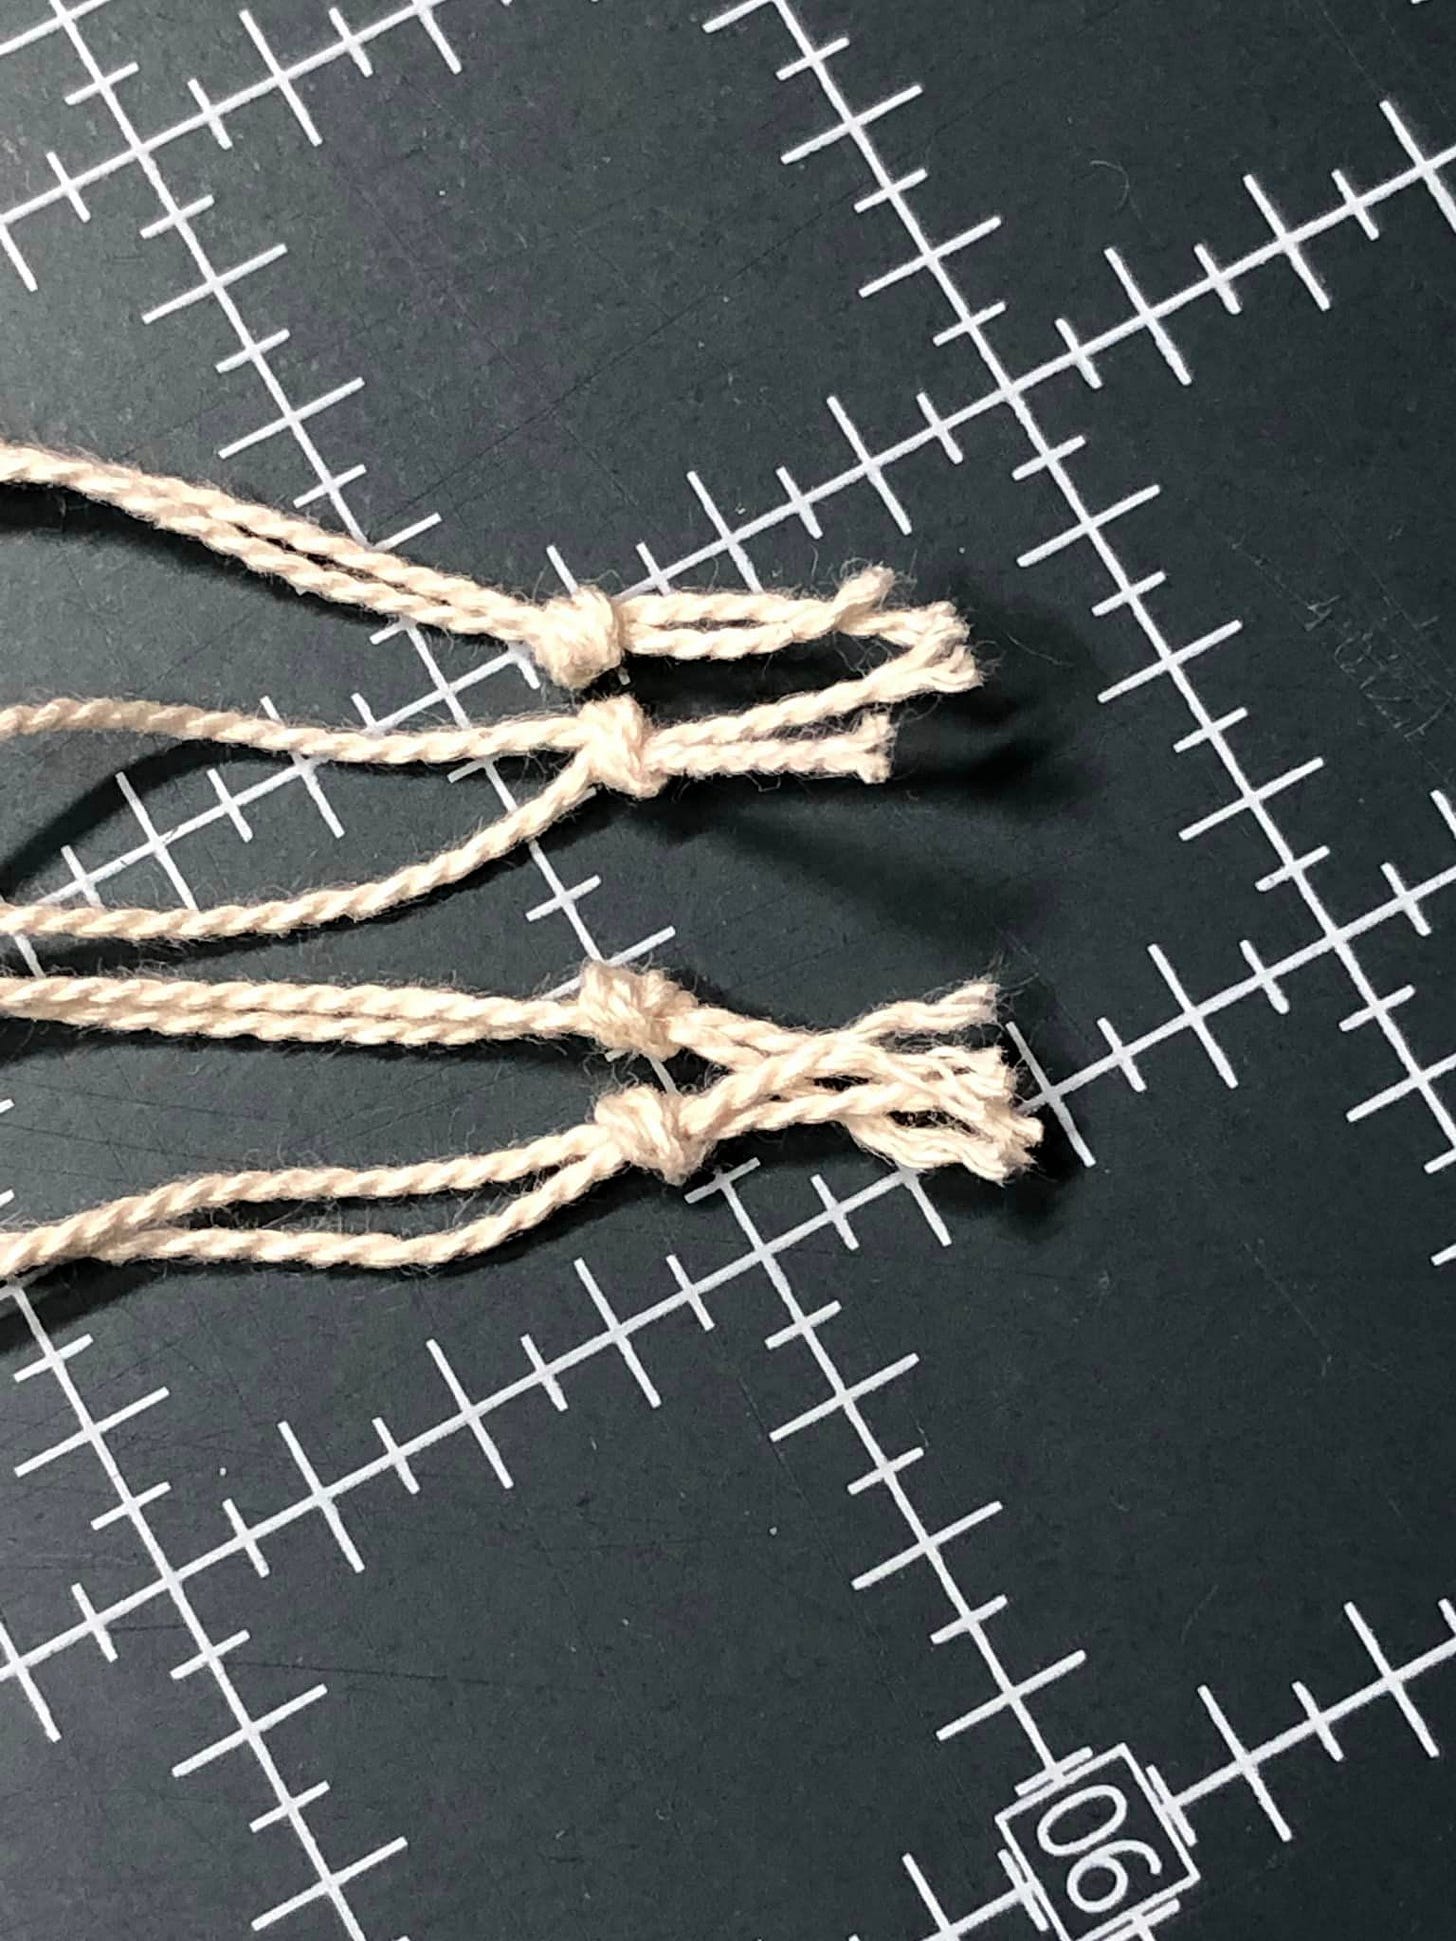
In solving my knotty problem, I had to skip the jig. That’s when I realized that if I could reduce how high I needed to lift that heddle rod to get a good shed, it would make everything easier. I played around with different heddle lengths and finally settled on cutting the strings at 11” (28cm) and using an overhand knot (with a bight) to tie them. This gives me a string long enough that I’m not fighting to create the knot, creates a loop that isn’t too fussy for putting around my warp and the heddle rod, and just works neatly.

You need to get the knot tied so that the total length of the doubled loop is about 4.25”. It’s really not difficult if you are careful to cut the lengths exactly at 11.” Tie one, taking time to adjust the location of the knot so that the loop extends to 4.25”. Then use that one to gauge the next one. Eventually, the ends of the loop will be your guide as to whether the knot is in the correct place. Measure the length of one after every few you tie to make sure you’re staying on target. Perfection isn’t the goal - consistency is. A slight variation (+/- a 1/8th inch) isn’t going to change the performance of any one string heddle. Just try to keep that doubled loop length at around 4.25".

Installing the Heddle Rod
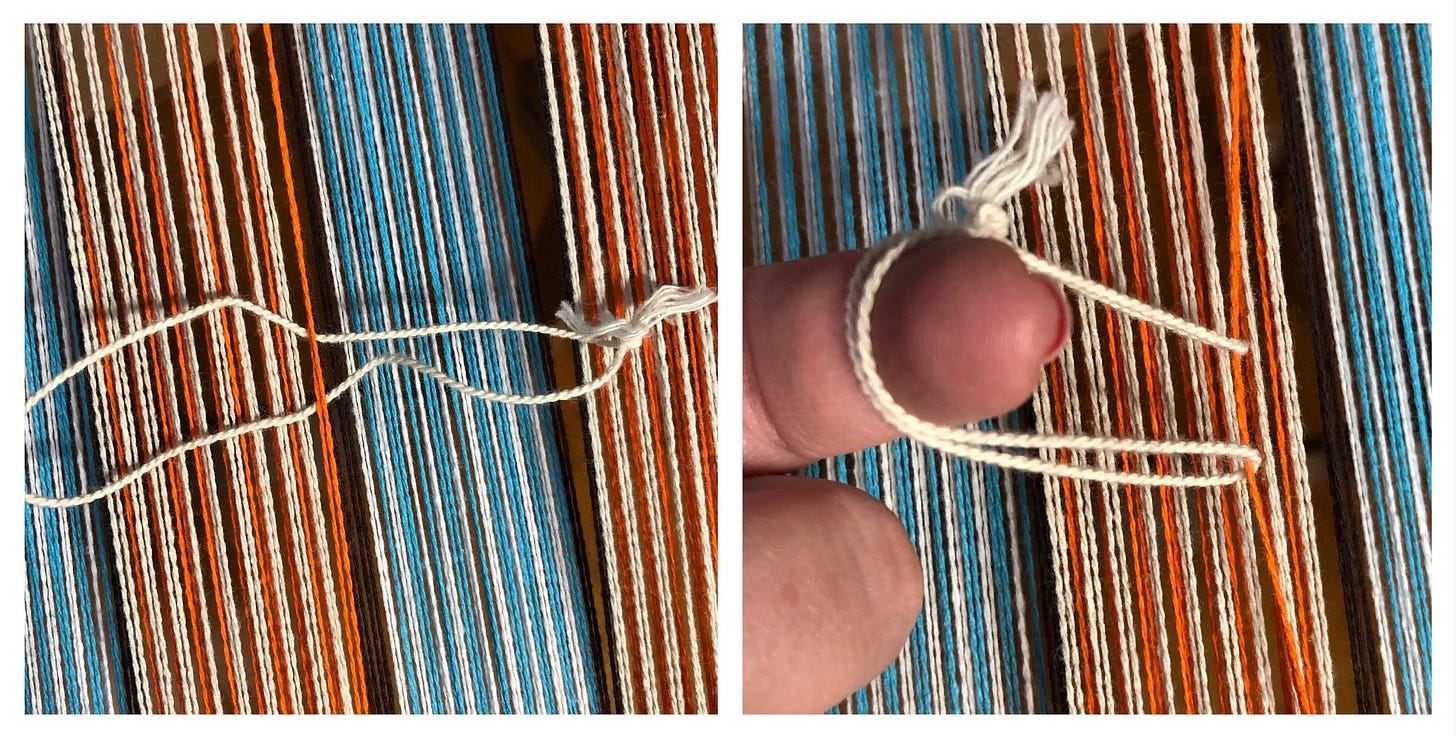
Really, this is the easy part! It’s much like installing a pick-up stick, except instead of just sliding the stick under the thread, we capture the thread in a temporary loop.
Your threads must be tied on and close to weaving tension.9 Then you slip the doubled loop under your warp thread, bring the two looped ends together, and slip them over the heddle rod. That’s it!

Hopefully, this demystifies some of the issues with string heddles, heddle rods, and what they are about. I’ve never understood why folks are intimidated by them and advise against them. On smaller looms, like the SampleIt, it’s an awesome solution to extending the possibilities of the loom because there really is not an alternative.10 They are inexpensive, don’t require modifications to your loom, and are only there when you need them.
Hope to see you in the Weave Along!
Feel free to ask any questions you may have in the comments, or reply to the email if you aren’t a Substack subscriber! It’s free, easy, and gives you easy access to the previous newsletter content, which may prove helpful some day!
For the rigid heddle weaver, if your loom is empty and you’re ready to go, there are NO limits. I think for one Acton WAL, I was warped on day 2 and had the project nearly finished before the end of “dress your loom” week. It’s all good. We just have a lovely advantage at times.
When working with a 3-shaft design, like the Box of Chocolates Towels, we can use the added option of “lowering” our heddles to create a specific shed. But once you hit four shafts there’s usually a need to create a shed using two different threads. If you can’t thread those third or fourth threads in an actual rigid heddle, then you lose the “heddle down” option and everything becomes a “lift". You can’t “lower” a pick-up stick or a heddle-rod.
And this temporary shed can be mapped to a “shaft” on a multi-shaft draft (or loom).
There are two ways double pick-up sticks show up in patterns. First is when you can put two in place and *leave* both in place. That means that you’re picking up a set of threads on one pick-up stick and picking up some of those same threads on the second stick. The second is when the instructions have you inserting a second stick every so many picks, in which case you are picking up entirely new warp threads from the first stick. By the way, replace that second pick-up stick with a heddle rod and you don’t have to remove it for the entire rest of the project. You’re welcome!
There are different ways to “assign” which shaft is being lifted with a heddle. I’ve been told it “doesn’t matter,” but I typically prefer to make my rigid heddles do most of the heavy lifting and to arrange things to avoid “lifting” the heddle rod and pick-up stick together. That may mean using a different lift plan for a RHL project than the multi-shaft pattern, but the end result is the same.
As usual with anything online, Your Mileage May Vary (YMMV).
My cheapest recommendation is to make friends with a tapestry weaver who uses Seine Twine for their warps and ask for any loom waste of over 11 inches. It CAN be used on a rigid heddle loom for Krokbragd weaving, so it wouldn’t be a complete waste of stash funds to buy a cone, but you could weave a LOT of Krokbragd with a 1/2 pound of Seine Twine.
I once tried 8/2 cotton - it was far too confusing to differentiate between my working warp and my heddles and the heddles didn’t have enough structure (they were too floppy) to help keep things organized.
I highly recommend re-tying and tightening your warp after installing pick-up sticks and/or heddle rods. You’ll mess with the tension some during the installation and it’s good practice to make sure you even any tension issues out that may have crept in.
Frequently, I’m seeing people put a second double heddle block on their looms for a third heddle. It’s an idea because, except for a few instances, you should be able to use just a the third heddle and a pick-up stick for most 4-shaft drafts. That said, I’m a fan of simplicity and traveling with an extra set of rigid heddles (I take three looms twice a year on long stays away from home) for my herd… It’s enough to have two heddles in all the planned sizes! I throw in a few pick-up sticks, a few dowels, a box of string heddles, and I’m set for about anything. But not all looms have the space needed for that second heddle block, so we will still need string heddles to stretch the RHL capacity.


